The Problem
Home automation can be a very complex thing. And as a maker you can already integrate many different gadgets into your home. But when it comes to HomeKit, the apple universe regarding home automation, the most common way is to add Home Assistant (or similar) on a Raspberry Pi to act as the HomeKit broker. The lamps, sensors, a.s.o. then only “talk” to the broker using MQTT. This allows you to create pretty complex scenarios and automations, but it also forces you to add an additional single point of failure into your setup, which can reduce the overall reliability. I always kept back from this solution, as I don’t want to power and service the Raspberry Pi.
The Solution
I then found a github respository which allows you to create native HomeKit devices, running FreeRTOS on an ESP8266 or even an ESP32. You may only need the demo repository, which contains all of the demo code, many different examples and the build instructions. The development setup is a bit complex, but the documentation in the Wiki section worked perfectly for me (using the docker stack on a Mac). The idea is basically to write your own gadget code, which then runs as a Task on FreeRTOS, a MIT licensed realtime operating system. There are already a lot of examples in the repository, like for all sorts of sonoff devices, but it is also pretty easy to create your own task for your IoT device by taking a look at the example code.
Another HomeKit lamp
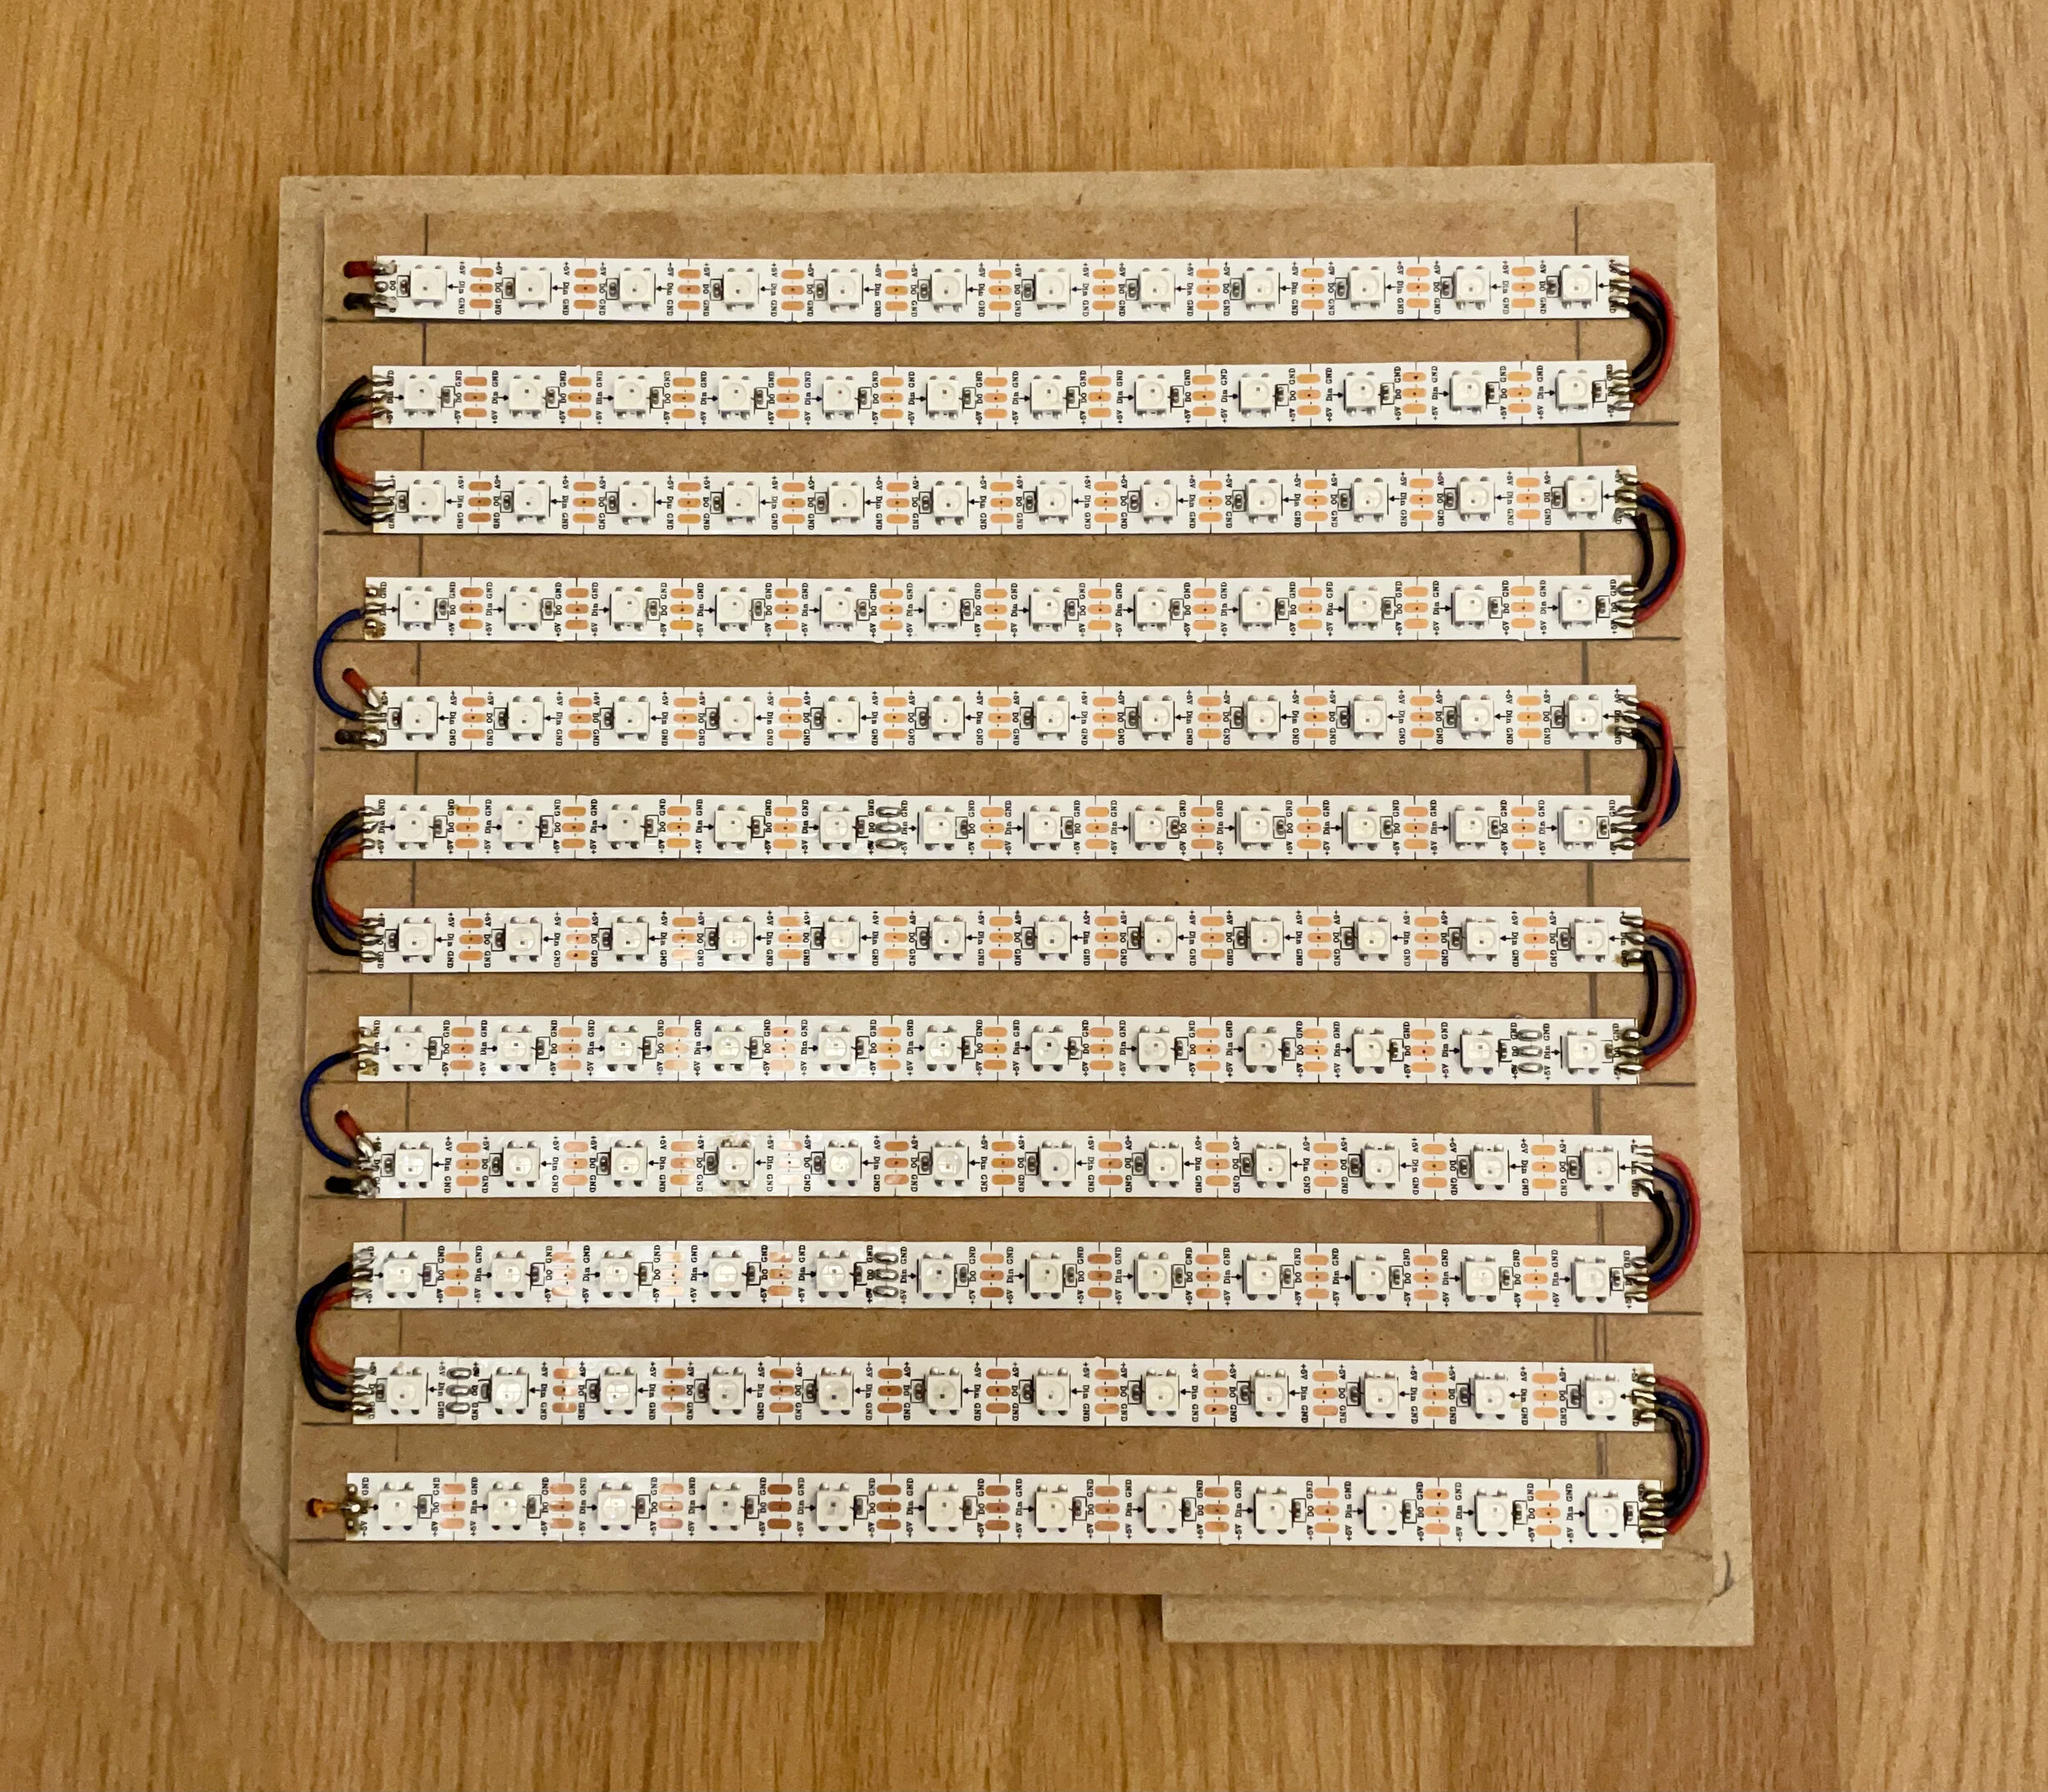
This sounded alluring, so now I only needed a use case to build such a thing. As I have quite a history with the WS28XX family of LED strips, meaning having them laying around, it seemed obvious to build a simple lamp. Also obvious was the choice of the enclosure, the IKEA RIBBA picture frame (the 23cm by 23cm version, white. currently only available in bamboo). It has some great features for DIY projects, as its cheap, offers enough space for the electronics and has a simple yet stylish design. For the ESP part, I wanted to use a cheap development board allowing me to program and power the board via USB but also to power the LEDs without a separate power circuit. Fortunately the NodeMCU v3 offers all those features, as it has a 5V output pin and is less than 7€ on amazon. And as we now know, we should use a 5V led strip, in my case a WS2812B RGB LED strip with 60 leds per meter. This fits easily 144 leds inside the picture frame (12 rows, 12 leds each). So I cut the strip to segments of 12 leds and simply connected the wires on the end of each row to the beginning of the next row, a.s.o. But there is one speciality. Some led strips have such high resistance (per meter), that the leds further away from the power input get darker. To prevent this I simply fed the power into the strip on three different positions. This reduces the maximum resistance to a third, each line only powering four rows of leds.

Then I only had to connect the strip to the NodeMCU. Power to power (Ground and VV) and data to RX (the port is fixed inside the software as it is using hardware i2s). And the hardware build was finished.

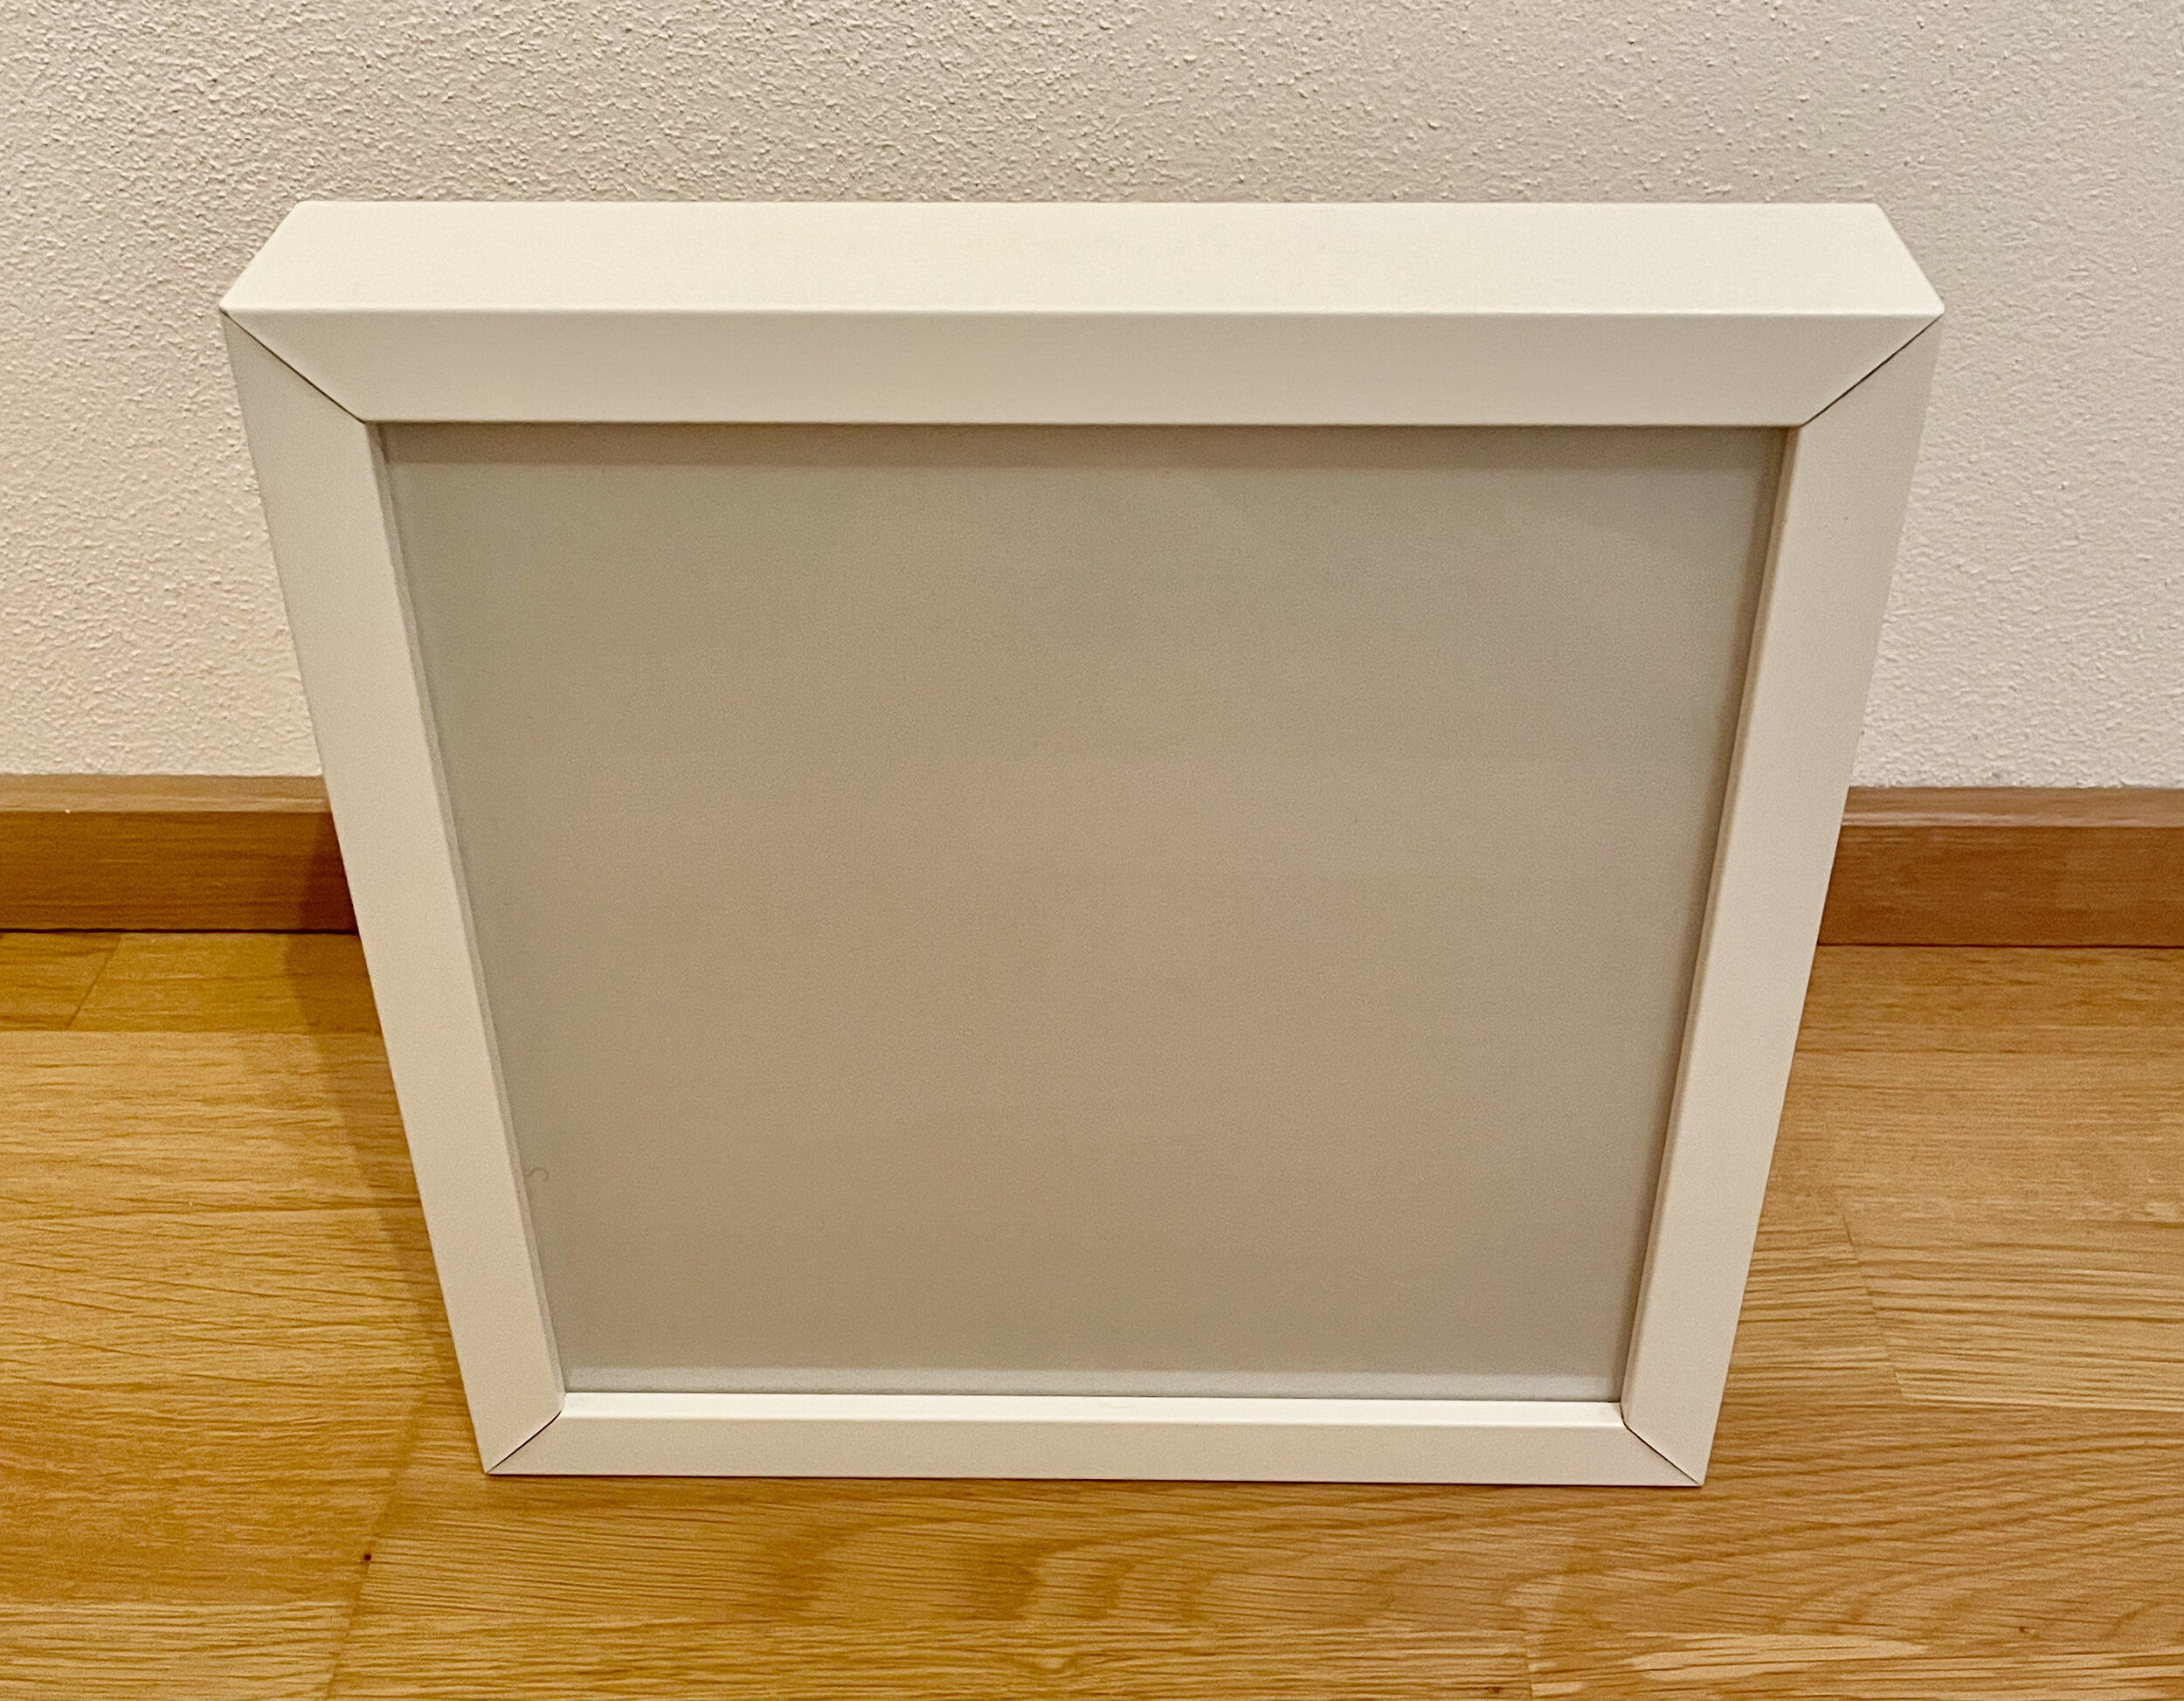
As you can see the enclosure is almost unchanged. I just added a cutout for the NodeMCU, giving it more space to breathe and added a notch to the bottom of the frame for the usb power cable. And finally to create a more defuse light, so you can’t see the single leds, I put a frosted film behind the front glass. Done.
The Software
In my case the demo project “led_strip” almost did the trick, I just needed set my wifi credentials, change the number of leds and be aware of the wiring. Ok, I also overclocked the ESP to 160MHz, as in my opinion this should be the default mode for the ESP8266. Although the initial setup was a bit scary, building and flashing the software were just two simple commands from the documentation.
PAIRING

Now you have a new HomeKit device and need to add it your home setup. There are different ways to achieve this, but the easiest might be using HomeKit QR Codes. You initially set the accessory password and setup id inside your code and use those to create a HomeKit compatible QR code to add the device inside the home app. A script to create those codes is also available in the main repository, you can see the result on the right.
So if done right, the setup process should be as simple as: Open the Home app, tap add device, scan QR code. And the new device should be added to your home. As our device is not apple certified you will get a warning, but you can simply ignore it.
You can alternatively also enter the device password manually inside the home app, as you pair the device only very few times, this is also not too much of a hassle.
USAGE

Sorry, but the light conditions make this hard to catch.
Now that the lamp is available inside the Home app you can also use HomeKit automation. In my case the lamp was meant as a corridor light switched by a motion sensor. It should actually also be possible to make your own motion sensor based on this stack, but I used a Philips Hue Motion Sensor instead. It is a really great little device, as it also monitors brightness and temperature and runs forever on 2 AAA batteries. This also requires a Hue Bridge in your environment, but you’ll need it anyway if you want to integrate any Philips Hue or IKEA TRÅDFRI device s.
By default the “led_strip” demo project already supports switching the light on and off and setting the color, brightness and saturation, but you can add and remove “characteristics”, as they’re called, as you like.
If we talk brightness, this is definitely not meant as the only light for a room. It is more a HomeKit mood light, which supports scenes and automation, maybe best comparable to a Philips Hue Bloom (around 60€ retail). I then measured the power usage on standby and on max brightness. So it seems the light strip draws around 8 Watts of power and the NodeMCU itself takes additional 0.8 Watts. So if the lamp is permanently connected to power, even when switched off, it will add to your power bill, but it is so minimal, that it won’t make you poor. Just to keep that in mind.
Almost done
So everything is was working, but if the wifi password changes, we would have to change the password in code, recompile and flash again. This is not very convenient, but there also is a ready made solution to this. The example project “wifi_config” offers a process for wifi configuration similar to my coffeePID solution. So if no wifi credentials are stored the esp starts its own wifi, you can then select the wifi and enter the credentials.
Pro / Con List
To close up this project, I want to give a retrospective in form of a pro/con-list. It shows why I like this project so much...
Pros:
native HomeKit support
pretty cheap
low build barrier
no need to recompile on wifi credentials change
Cons:
kind of complex development setup